
Plaid Fabric Pumpkins Tutorial
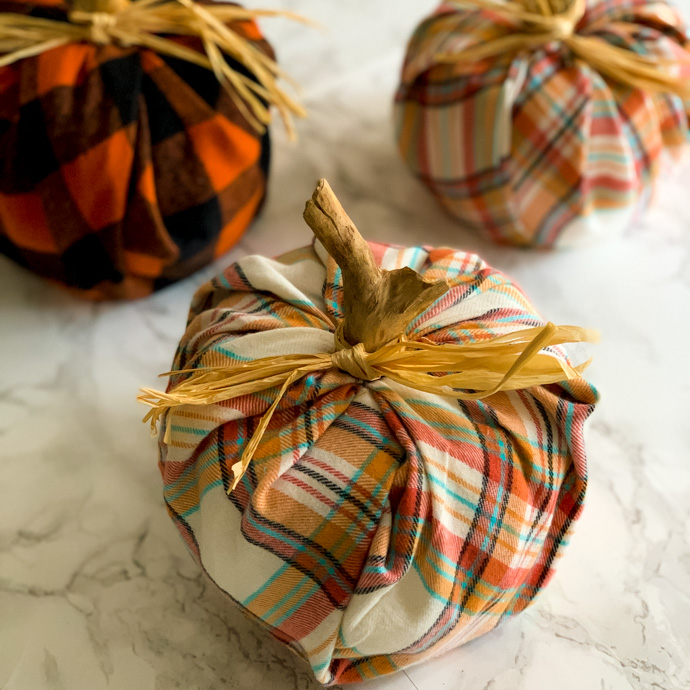
Have you started decorating for fall? I packed up my summer decor over the weekend and swapped it out for everything pumpkin. I seem to have a pumpkin obsession and always want to add more to my collection. I was in TJ Maxx the other day and came across some black and white buffalo plaid pumpkins that were super cute, but I wanted something a little bit more colorful. I also thought I could easily recreate them at a fraction of the price. I love getting inspiration from stores and then trying to emulate it at home. I’ve seen tutorials using balloons to make pumpkins but decided the most straightforward route was to use toilet paper rolls. So today, I’ve got an easy tutorial on how to make cute plaid fabric pumpkins in only 5 minutes! Just follow this uncomplicated DIY tutorial to make your own plaid fabric pumpkins!
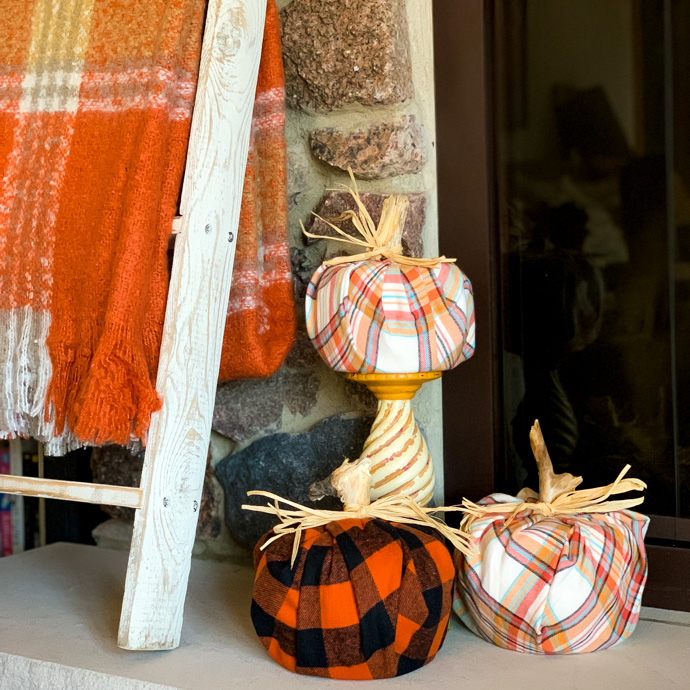
Plaid Fabric Pumpkin Supplies:
1/2 yard of plaid or fabric of choice (1/2 yard will make 2 pumpkins)
Mega size toilet paper rolls
4″ – 5″ twigs (I just went around our yard and picked up a few and then removed the bark)
Raffia ribbon
Scissors
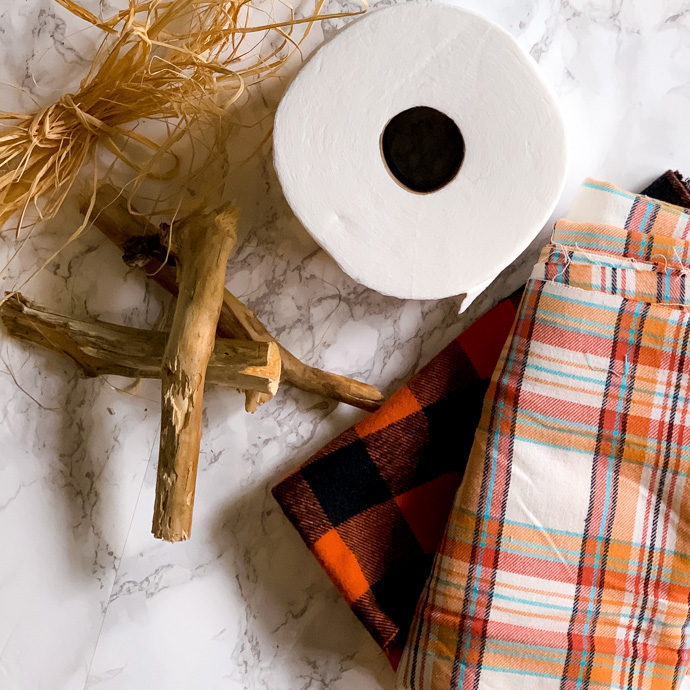
Plaid Fabric Pumpkins Instructions:
Cut your fabric in half (it will be an approximately 22″ square).
Unroll the toilet paper about 10 -15 times, then loosely re-roll it back up twisting it so that it has a more rounded shape.
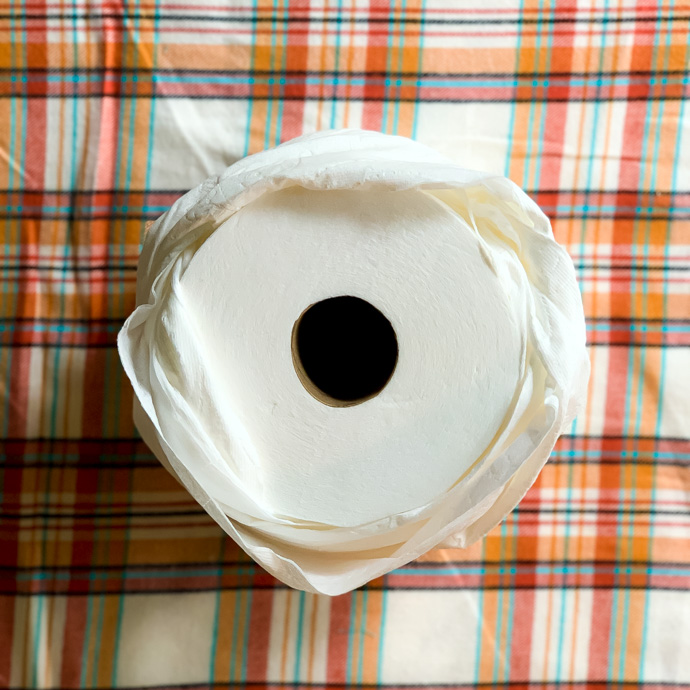
Grab one end of the fabric and tuck it into the center of the toilet paper roll. Continue folding and tucking with the other corners.

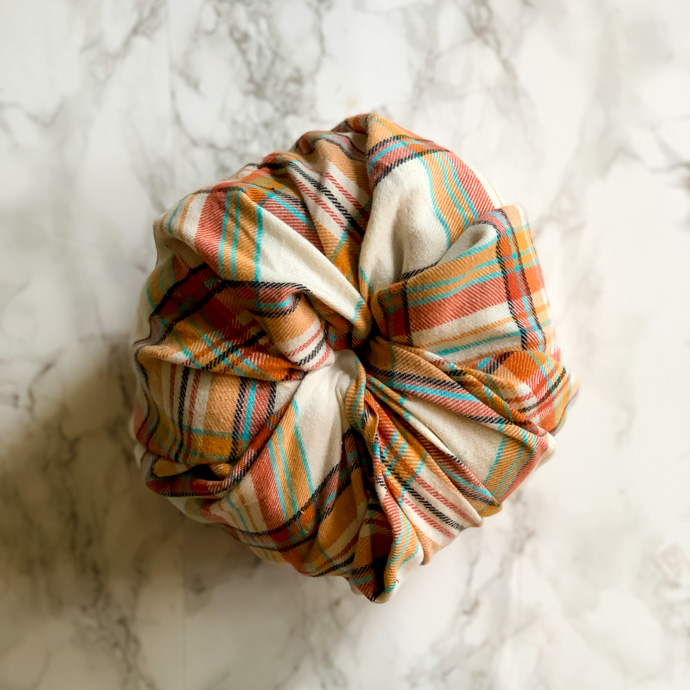
Take a twig and place into the center of your pumpkin.

Finish off your pumpkin by tying some raffia ribbon around the stem.

How easy was that? Cute plaid pumpkins in 5 minutes to add a rustic touch to your fall decor!

For more fall decor inspiration also see:
DIY Buffalo Check Fall Wreath and Fall Porch Tour

As always, thank you for reading!
Linking up here.
Follow along!
Instagram | Bloglovin | Pinterest | Facebook | Feedly | LIKEtoKNOW.it

![Life Lately [Feb ’25]](https://www.dousedinpink.com/wp-content/uploads/2025/02/OKeb9Mwg_zN.qVH406ZLSJoEVZE1EK5RTI3cUO4XaAPm9Junkf5JY0Tz65UanqBE6FyWUOn7blooxeT4ywYi9lpvZh_qbvCrmQJQscqxpBkWeYcp7zWn8ErD4ydBhVGstPBTpPKoUgO0mJU0qZzvWbPTH5AlabnkQ34gF1.webp)
Leave a Reply